Monday, April 1, 2013

Country Girl's Prayer...


Overwhelmingly and abundantly blessed.... I repeat these words with an attitude of gratefulness every morning as I walk through our place attempting to make sense of "the everywhere I look something needs my attention and right now" struggle and try to prioritize.  I remind myself that these are all things I hoped, dreamed and prayed for and can't imagine life without.  

But... all this abundance doesn't take care of itself.  Nor is it without disappointment... nor my mistakes.  

Yesterday morning at daybreak I doctored one of my hens and went to Easter service hiding "Blue Coat" stains on my finger tips.  Believe it or not,  never in over 30 years have I ever had an outbreak of poultry mites.  It was a huge lesson... broke my heart to think I let it happen.... and an incredible amount of work coming at a time when we were already exhausted and overworked.  And family was coming for dinner.

The Lord just opened up his hands and said here you go....

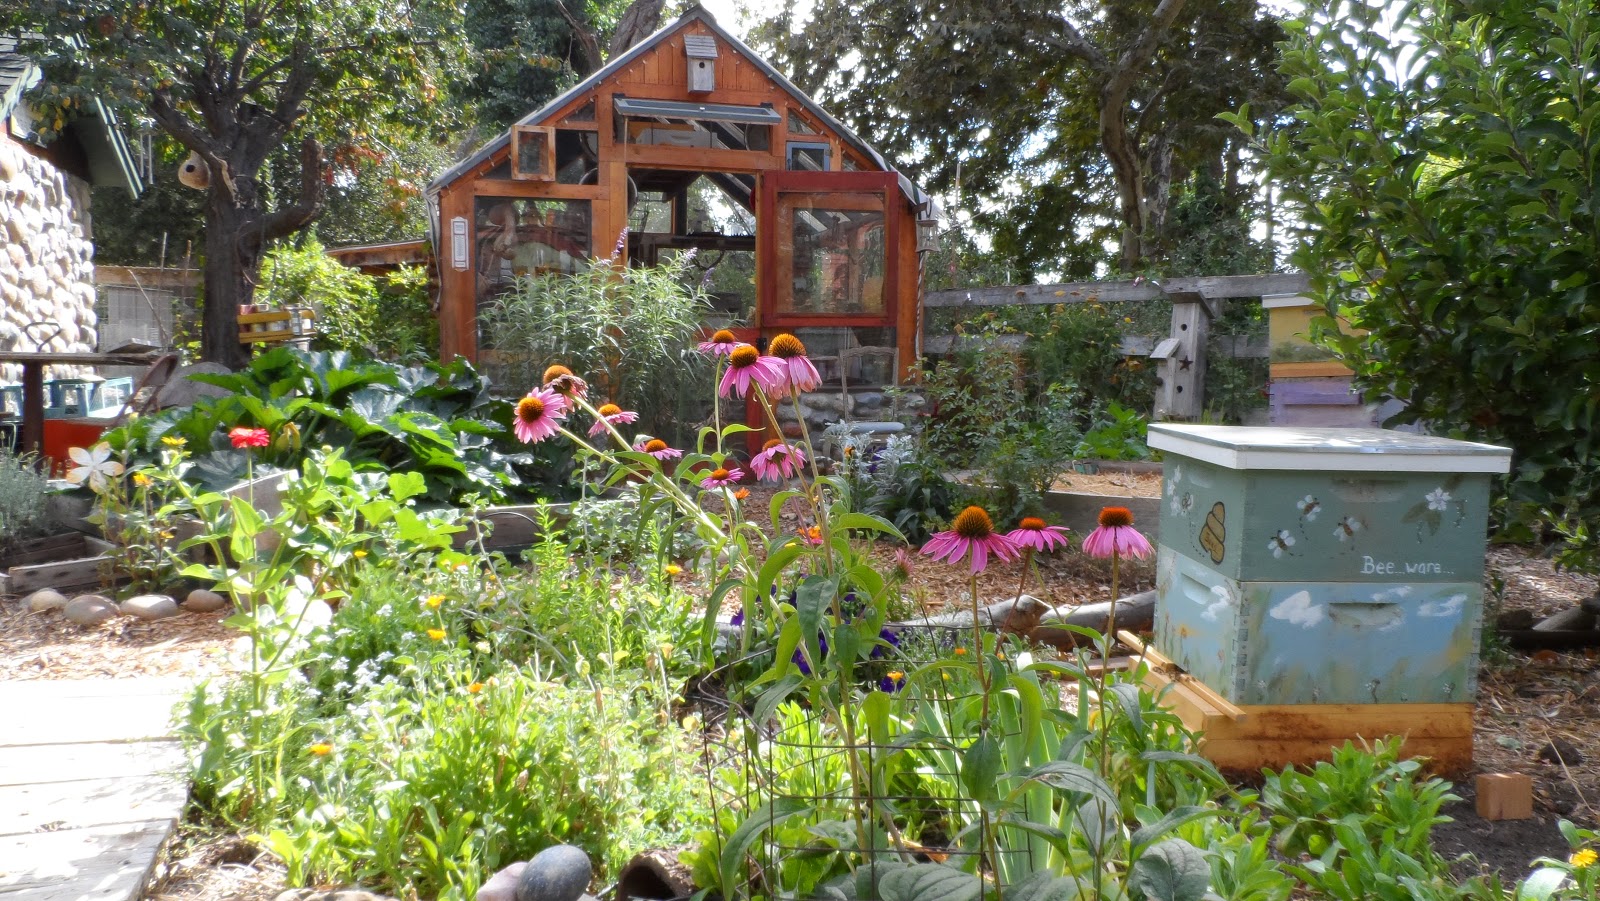
I remember an evening four years ago when a neighbor called and told me to make a place for my bees... they would be arriving at daylight.  It was a surprise to me... but I took it as His gift.... because He knew what was in my heart.  I got my beloved bees knowing nothing about them.... but learned very quickly and they have been such a joy and quickly multiplied.  

One of the six colonies seemed unusually quiet this spring and I had come to terms with the "worst".  Last week when I finally had "the time" to open it up my heart cried in anguish.   They were gone... but not without leaving me their huge... incredibly awesome special gift that they had worked so hard to give me... an entire super full of thick frames of solid honey.... but because of my lack of judgment it had spent the last several months without bees to keep it from fermenting.  An entire super of beautiful molded and fermented honey... 

but ... after my hearts's desire whispered in His ear....

I've been waiting for two weeks for my does to kid.... I suspected one might not be pregnant... but certainly the other.  They had been fed the perfect diet.... my birthing kit was ready.... I'd watched every "You Tube" video available.  My husband had worked so hard to finish the new kidding pen in time.... but no babies will be bouncing around in it this year.  I even slept at the barn four nights in anticipation...  

my country girl's prayer....

Such lessons.   A survivor at a very young age I am rarely discouraged. Today I am humbly reflecting on His grace... somehow I feel like I need forgiveness.   In this picture of my grandchildren taken after Easter service yesterday, I am reminded that we are all on a journey... thankfully His grace is sufficient for each and every day... and thankfully tomorrow is another day in which I am...

Overwhelmingly and abundantly blessed....

Thursday, February 14, 2013

Happy Valentine's Day....


One of our Wild at Heart Farmgirls... Gyspy Fiddler ... is gittin' hitched today to a wonderful man so I wanted to help celebrate by making them a special farmgirl Valentine... you know... farmgirl style... making "do" with what you have.
I took a ring from a very old barrel we have... couldn't keep those rings on that old thing anymore... and bent it into a heart.  I drilled two holes for the arrow to go through.  For that I found an old rusty rod that came out of an old mattress woven with the coolest rusted spiraled wire.  We've had it hangin' around here forever just waitin' to do something with it.  Worked perfect.

 I keep a pile of old tin cans out back so they can rust in the weather... love to do all kinds of things with them.  I chose a small olive can size...cut the lids off both ends and flattened it on the ground with my boot.  

WEAR GLOVES for this next part!!!!  I cut it in half with snips about the length of a feather.   I cut four angled strips on each side for feathers.  The other half of the can became the arrow tip.  Bend each sharp side over slightly to make sure there are no sharp edges.  I actually hammered everything down real good to be sure.  I did NOT flatten between the feathers ..  I will warn them about those sharp parts although they really are not exposed.

To secure them to the shaft.... I hammered two small nail holes side by side into the tin at the top and bottom of the feathers and the arrow point.  I cut  small pieces of rusty wire about 2" long and bent them to look like fencing nails.  Poke them through the holes and bend to the shaft with needle nose pliers until they stay in place. 

I finished it off by adding some old dried love in a mist seed pods I keep in my greenhouse just because I love them. Soft pink looked so pretty on the rusted metal.  Didn't take long at all and turned out real sweet.Last but not least... I put my darlin's tools away... it is Valentine's Day you know!

Wednesday, February 6, 2013

Winter Soup with Summer Veggies...


I love making soup... I love walking outside on a brisk morning collecting onions, herbs, kale, collard greens, and whatever else I can find in the garden in the dead of winter to add to my soup stock... I love putting it on first thing in the morning... then going about my business all the while smelling the most heavenly aromas coming from the kitchen with the added comfort of knowing dinner is, for the most part, done!  

I also love saving valuable typically disgarded Thanksgiving turkey carcasses.... or leftover roast beef bones from the dog... or neck, back and ribs of a chicken... and turning them into delicious,  nutritious calcium enriched soup stock.  I purchase whole chickens making a meal from the legs, breasts and thighs and turn the backs, necks and ribs into a rich broth... Add any of the above to a pot of water with an onion, celery, garlic, salt and pepper, thyme springs, carrots...whatever you have!   Add a tablespoon of vinegar to your broth to help pull all the very good for you calcium rich ingredients from the bone into your broth.  Cook it for hours long and slow. Then cool and remove the bones.  (If I'm not immediately making soup I will freeze it in glass jars being sure to leave 1" of headspace in the jar).     

A pot of soup at our house never tastes the same.   A couple summers ago I started dehydrating my summer surplus of vegetables.... zucchini, okra, cherry tomatoes, peppers, celery, onions, eggplant, squash.. whatever we couldn't eat fast enough.   If I had beans left over after a pot of "good ole' black and pinto beans" I'd spread them on sheets and dehydrate them.  Together everything went into large jars.... they were so pretty sitting on my pantry shelves.  (I also keep a soup container of leftover bits of brown rice, meat or veggies in my freezer.) Add a quart of those frozen roasted tomatoes we learned how to make further down in this blog.  Sweet joy is tossing a handful of your dried summer garden veggies and watching them turn your homemade soup stock into a rich, flavorful, beautiful, colorful, delicious soup.  No recipe... just a little of this and a little of that all combined makes an incredible pot of soup!  Simmer it all about an hour or more until thickened and the veggies have had a good chance to rehydrate.  Yummm....

What was my desire to be frugal turned into a huge time saver and nutrition bonus.   I must say I now cannot imagine trying to make soup without a fist full of summer veggies... and when my jars aren't quite as full as I'd like them to be... I get nervous.  I think I'm hooked.

Friday, January 11, 2013

Simple AWESOME Granola Recipe....

I'm thrilled.... simplicity wins again.  When you cook from scratch it just plain 'ole takes time.... I don't have time.... so any TIME  I can cut TIME and still make awesome quality homemade nutritious preservative- free whole FOOD.... I'm thrilled!

I tweeked a recipe I found in 2012 Cooks Illustrated and whipped it up in half the time it took me to make the old one (you will find it down here somewhere on this blog) and it tasted awesome.  You can vary the type of nut and dried fruit, add coconut flakes (my favorite) and even a couple teaspoons of cinnamon if you like.

Simply Awesome Granola Recipe

5 cups thick rolled oats
1/3 cup real maple syrup
1/3 cup brown sugar
4 tsp. pure vanilla extract
1/2 tsp. real salt
1/2 cup vegie oil - olive or coconut
2 cups chopped almonds
2 cups dried fruit

Whisk syrup, sugar, vanilla & salt.  Whisk in oil.  Fold in almonds thoroughly.  I baked mine at 350 degrees in a large pan for 15 - 20 minutes stirring every 5 minutes or until your desired crunchiness.  Allow to cool and add dried fruit.

They flatten theirs out on a cookie sheet and cook it longer to make big crunchy chunks, so if that is the way you like it... have at it!  We like ours less crunchy and more like a cereal so we don't flatten it down. You pick!  I quadrulpe the recipe and keep it in two gallon jars cuz I don't have time to cook.... remember?

Sunday, December 16, 2012

Sourdough Sandwich Bread...

I love the bread table my husband made me.... especially when there's delicious loaves of sourdough cooling.... the smell is more than any of us can handle and one loaf rarely makes it through the cool down period every book or cook advises.  I never could figure that out... I guess the flavors blend or something.... but just how the heck are you suppose to wait? We dig in...taste's good to us!

True sourdough bread can be tricky ... creating a starter is not difficult but requires patience as does learning to bake bread with whole grains. While  I had pretty good luck with hearty artisian bread that was delicious thickly sliced for soup or dinner,  I wasn't satisfied with any of the sandwich bread recipes I'd tried.... in fact alot of them turned into croutons and the really bad ones went to the chickens!   Until!   I am a long time subscriber of "Countryside" magazine and had copied a recipe years ago but had never tried.  I had mashed potatoes left over from Thanksgiving and knew this recipe called for them.... it's my new favorite... tender crumb and the loaves rise well above  the pan.   Thank you Shawn & Beth Dougherty from "The Sows Ear" and the Queen of Minnesota farm wife Sandra Callens of "Silofence Farm".

"Sow's Ear" Whole-Meal Potato Bread Recipe...

The night before, refresh your starter if you are using one.
In the morning, boil and mash enough potatoes to make 3 cups (I used mashed from Thanksgiving with      cream and butter and salt and pepper and everything)
Combine in a LARGE bowl with:  6 cups warm milk, OR if fresh whey is available, 2 cups whey can be substituted for an equal amount of milk as whey is an excellent dough conditioner.  (I did substitute)
Add to this:  1 cup honey or other natural sweetener (I used honey)
                    6 eggs
                    1/2 cup melted butter
                    2 tsp granulated yeast (I used SAF)
                    1 cup sourdough if you are using it  (I did)
                    Sufficient freshly ground whole wheat meal to make a stiff sponge.
Sponge:  You want the sponge stiff enough to stand a wooden spoon in for several seconds before it falls over but not so stiff as to be dry.  All your flour is added at this time in order for the bran to absorb all the moisture it wants; if you were to skip this step you would end up adding too much flour in the next step.  The sponge should be allowed to work for at least an hour but can sit overnite as long as a brief stir now and then releases carbon dioxide gas in order as not to kill the yeast.  (I left mine overnite)
Finalize the dough:  Add 2 Tbsps. salt and enough flour to make a workable dough.  Turn it out on a floured table or countertop and knead adding flour as necessary to make the dough elastic. About 15 minutes.  (I let my machine do that)  Place dough in a floured bowl.  Let it rest 15 minutes covered with a damp towel.
Turn out on the table and fold it in, one side at a time north, south, east and west.  Invert and return to bowl covering with damp towel.  Give it a good rising... until it rounds up nice under it's damp towel.
Cutting the loaves:  Turn risen dough onto a floured board and cut into two-pound pieces rounding each and setting to rest for 10 minutes, covered.  After the dough has rested flatten each piece  to about the size of a serving platter and fold in the sides to meet in the middle and starting at the end toward you rolling up into a tight loaf, pinching the edges to seal.  Place seam side down in greased loaf pans.
Allow to rise until it feels soft  when poked with a finger but does not hold the dent.
Bake at 375 for "something less than an hour".  The loaves sound hollow when tapped.  Makes 6 loaves   Enjoy!


Thursday, November 29, 2012

Horseradish from the Garden


Last spring one of our Wild at Heart Farmgirls... gave me a horseradish start for a gift.  I was intrigued but didn't have a clue how lucky I was about to become.   It grew into a beautiful plant and I loved the horseradish scent when my legs brushed by it in the garden.  After harvesting the plant last fall and my family promptly consuming every bit of it, we couldn't wait for this year's harvest.  I thought I'd share what little I now know.

Harvested Horseradish...                        
Horseradish loves water and sunshine although mine was planted in shade and still did very well.  Hopefully.. unlike me you'll plant it where it's easy to dig up.  Word of caution:  It is extremely invasive.  Every tiny "sprout" will turn into a plant so make sure when you harvest it you get most of it.  I am assuming the larger "fatter" roots were those I missed digging up last year and at first I was really excited but found them to be more "woody" when processed than the more slender roots but were still very very good. 

Scrub clean with a stiff brush.
Another word of caution: take
it outside... or wear goggles.
Your eyes will thank you. Peel
the roots and dig out any brown spots.  Cut into very small pieces...mine were too big and it was hard on my blender.  Grinding horseradish is like grinding... well... a tree.  Add an amount your blender can safely handle.  I used a Vita-Mix but a food processor or blender will work.  Grating gives it a wonderful consistency but because I am harvesting my crop rather than preparing a single root  I use the blender.

Add apple cider or white vinegar to almost cover the chopped root and process.   I added my other ingredients  while blending... it made it easier to blend.

  Optional Yummy Ingredients: I used a Tbsp. of sugar and 1/2 to a tsp. of salt and probably 1/2 to 3/4 cup mayo to each 3/4 full blender container.  Some use sour cream or a blend of both... others like just plain old horseradish....   It freezes great and you can can it too!    A great big thank you to Wild @ Heart Farmgirl  "Appalousa Gal"... for blessing me with my own horseradish plant.... who would have thought!  It has been a gift that keeps on giving!

Thursday, October 11, 2012

Elderberries & Very... Very Special Echinacea...


I almost missed the elderberries this year... we came home to the last of them.  Today it finally rained buckets.... THANK YOU GOD.... so I took the opportunity to get it made.  I don't do flu shots.  Did you know a flu shot only fights the certain strains of flu they are expecting for the year.... I read somewhere that elderberries actually fight eight strains of influenza.  I take a tablespoon a day during flu season or when my resistance is down just to keep my immune system going.  If I'm sick I take a teaspoon every 3 - 4 hours.   I know from experience that it really helps get rid of the flu if taken once you already have it.

I'm lucky enough to have elderberries growing wild in the creek behind my house so I used fresh today although dried or frozen work to.  You just use twice as many elderberries if using fresh.  One important point:   if you're harvesting them yourself make sure you don't include any stems or leaves as they are very poisonous.  I love mountainroseherbs recipe and  you can also purchase your dried elderberries from them if you have a hard time finding them in your local health food store... 

http://mountainroseblog.com/elder-berries/  or http://naturalfamilytoday.com/health/elder-berry-syrup/ can provide you with two different ways of making the syrup as well as instructions on how to make an echinacea tincture. It's so easy you can't afford not to.

Very... Very... Special Echinacea...


Several years ago we flew with my husband's family cross country to Maine visiting the town my husband was born in.  Walking along a street I noticed the most beautiful echinacea I had ever seen,  snapped a dozen seed pods that were beautifully dried and stuffed them in my pocket.  They made the trip back to California in my suitcase.

The next spring I started them in my greenhouse and they actually came up.  I transplanted them in several places in my yard.    Echinacea from the town my husband was born in brought as seed pods in my suitcase clear across the USA.  Well... I think it's pretty special  and the butterflies and bees love it.

But no.... that's not where I get my echinacea for my tinctures.... I can't bear to dig them up for their roots.  Thank you Mountain Rose Herbs for having a plentiful supply. If you ever bought a bottle of tincture at a health food store you'd probably get sick just paying the prices they ask.  It's so easy to make at home and probably  a much better tincture....  no different than making vanilla extract!

Saturday, October 6, 2012

Roast Those Tomatoes...

Then freeze them in quart or gallon freezer bags laid flat in the freezer instead of canning them.... you'll never go back!  That is, of course, unless your freezer won't hold any more.  Use them just like canned tomatoes... in soups, chili, salsa, as a pizza sauce, over pasta or chicken...... the only difference will be the incredibly delicious difference in taste.  

I might mention that I've roasted tomatoes for years in pyrex 9 x 13 glass pans as I was taught.... but I never will again.  This WAS a pan of delicious nearly done roasted tomatoes in what's left of a  pyrex 9 x 13 glass pan... another pan was on the top rack and of the million glass pieces that exploded....  half of them also landed in the top pan.   Use a roasting pan... those specked granite old fashioned looking things,.....just not metal.


Preheat your oven to 425 degrees.  

I always start by pouring a generous amount of olive oil in the bottom of the pan.  If you're using large tomatoes cut them into quarters, no peeling or coring.... just cut them up.  You can throw your cherry tomatoes in whole!  Add a large sliced onion and dice up an entire head of garlic.  I throw a couple cups of fresh oregano, rosemary and basil from the garden..... couple teaspoons of salt and pepper to taste.  Drizzle more olive oil and a good 1/4 cup of balsamic vinegar over the top of the ingredients and stir it all up until well combined.  That's it, unless you want more.

Depending on what's in the garden, variations might include green or red peppers, sliced zucchini and even eggplant.  It reminds me of ratoutille, only roasted ratoutille... I especially liked the result the year I had all different kinds of tomatoes, especially the yellow pear ones.

Roast them on the top racks of the oven until the juices start to thicken and the tomatoes start to blacken 1 - 1-1/2 hours, stirring occasionally.  The smell will drive you crazy!   Let them cool completely and freeze flat in quart or gallon sized freezer bags.     We usually have pasta that night cuz we can't NOT!

I love chunky sauce, but if you have kids or you're like my kids you might choose to process it a few seconds in a food processor.  You'll never go back!

Saturday, September 8, 2012

Shawnee Rose....

And she was gone..... just like that.  


I suppose there's no use in explaining how it happened... no sense remembering how young she was ....  no sense wondering why there was never a sign.   She's gone and our hearts are breaking.   I suppose we should really get it together... just can't seem to...


forever missed.....our little Shawnee Rose.....


                                                     September 20, 2006 - September 6, 2012

Saturday, April 14, 2012

Yippee!! Baby Chicks....


Nothin' more precious than baby chicks..... and there is nothin' I appreciate more than a mama hen who loves her chicks and takes good care of them...like... instead of me.... not that I don't enjoy personally picking 'em out and bringing those tiny fluffy little cute adorable things home from the feed store...and then there's the pickin' 'em up from the post office after ordering online...it just seems so....oh... I don't know..... the best part about that was walking into the post office and immediately hearing the "peep peep peeps" echoing through the halls. I always knew what that meant.... "it's about time you got here....get us the heck out of this stinking box!"

Just the memory of keepin' them warm, fed and watered (how many times a day did I clean out that water thing) makes my grateful heart oh so big ...and then there's the cleaning out the pin thing ... and the room it takes up in my laundry room.... oh thank you mama hen.... i'm gonna have to name you.... you deserve a name...

Wednesday, February 29, 2012

Thankful for the Onions....


This was a small section of the 400 onions I planted last spring. I knew they wouldn't make it until we got back from our vacation, so I pulled them early, even before their tops had completely dried out and fallin over. They were everywhere... During the day they cured in the shade on every screened item I could find making sure they didn't touch in order to expose each onion to the warm air so they would survive the winter. Every morning they needed to be brought from their previous night's shelter. Every evening back they went... but not before they were given the "cured" test. I would squeeze the stem where it met the onion and if it felt totally dried up and empty it got it's roots trimmed and top cut about 1" above the onion. Because I don't have a basement, into my garage refrigerator they would go until there was no more room. It was alot of work, but now almost a year later I still have plenty to make it until this year's crop comes up and is ready for the same process.

ONION SURVIVAL TIPS...


Keep an eye on them throughout the year where ever you keep them... Because there were so many in my refrigerator I realized that at one point they were on the border of freezing.... they were also creating alot of humidity which could have spoiled them if I wasn't paying attention. If that starts happening make sure to remove them and lay them out to dry out. Or... remove the ones that look vulnerable and take them into the house and use them first. Just chop a bunch up and put them in a dish to use as needed!

If They Start To Sprout or Soften...


... Into the kitchen they go before they spoil where I dice them up and either throw them into glass containers and freeze for later use or fill up my dehydrator and dehydrate at 145 degrees for about 6 hours. You won't believe how good it smells and the result is dried minced onions for topping your casseroles, salads or whatever you like! Yes it's work but you are going to have to dice those onions up sometime!!

Monday, February 6, 2012

Summertime...

Dreaming of Tomatoes....In February

These cold winter rainless days have my garden, bees & me dreaming about flowers, tomatoes and warmer weather. Actually... maybe it was Saturday's trip to our local Farmer's Market where someone was selling huge, beautiful, red gorgeous looking tomatoes and basil. In February??? Who was that??? It's been consistently in the teens or low twenties at our little homestead for months now! How do they do that? Must be those hoop house things... anyway... I was very impressed. So much so that I decided to remind myself that I really did have a garden this past year (as I peek through the windows and see not a plant or live thing out there in sight!) My poor bees agree. Good thing I left those big supers of honey for them...


The Harvest...

Friday, November 4, 2011

Home Sweet Home....


I remember praying for my own"home" when I was young... a place where I would finally belong.... where my children would belong... a place where they would always be loved, appreciated and respected. I wanted them and my grandchildren to know who they were, where they came from and understand why they became who they grew up to be.
While on a walk today I visited with a young couple from our neighborhood who touched my heart. They told me they had decided to decorate their home with blown up pictures of their lives together. She was also going to frame calendar pictures she loved. Inside my heart cried "yes" and I was reminded of this entry written months ago but had yet to post. I shared that I had my own treasured "calendar" bear pictures given to me by my grandmother that have always hung above our piano. Before I was born my grandfather cut them off a calendar and made frames for them... I shared what a treasure they were to me.
The idea of "investing in a house" never ever occured to me. I wanted a "home".... nothin' fancy....just a "home". Over the years it has become just that. It's plum worn out from raising our family... years of hosting Thanksgiving & Christmas week long events where sleeping bags lined the floors and kids slept exhausted from late night games and running a home business where customer's became my best friends.
Department store "pics" have no place here... our rooms are filled with family heirlooms, gifts from our children and special friends, treasures from places we've been, vintage yard & garage sell finds, and things of nature. Some day the hand peeled log beds and beautiful pieces of rustic furniture my husband has filled our home with will adorn our grandchildren's homes as my grandfather's bear "calendar" pictures adorn mine. The door frame in the kitchen marks the heights of each of our children on their birthdays. Scriptures I cross-stitched so many years ago hang framed on the walls reminding us that our lives are blessed because of Him.
When we bought our home 31 years ago my father-in-law wrote in a card he and my mother-in-law gave us"your new home is a living monument to you",  every day life here on our little homestead have made it just that.   It’s not about the stuff. It’s the journey and the memories… it takes a lifetime to make a home your… home sweet home.

Without Love...

This poem prefaces photos in an album I created years ago when we remodeled our home... the picture was a gift from a precious friend and it says it all...

Without love a house is just a house... a ceiling, walls and floor… but fill that house with faith and love and it becomes much more.

A house is where your dreams come true for love abides, you see... and love makes a house a home... regardless of pedigree.

Home is a shelter from the storms of life and sanctuary too... for loved ones wait behind the door to hug and comfort you.

It’s a home where God is honored and the Bible’s often read and there the children seek him before they go to bed.

Home may be a simple shanty beneath the stars above, but blessed are those who dwell within a house that’s built with love.

Wednesday, August 24, 2011

Tuesday, August 23, 2011

Seeley Lake Rendevous...

I would meet them in one week at Seeley Lake to drop off their second weeks food rations. It was good to see them in such good spirits... a little thinner I imagine. It has been tough going... if the physical challenge isn't enough the mental proves even tougher but the beauty, adventure and sheer challenge of it all keeps them going.

When I arrived they were pulling everything imaginable out of their packs to send back with me... guns, bike tires, whatever they could to lighten their loads for the second half of the trip. We went straight to breakfast where they consumed it in about 20 seconds anticipating how many minutes until lunch. After a quick stop at the grocery to pick up their next two nights dinners (if you could call it that) we just went straight to lunch...I think they were finally full...then for a swim in Seeley Lake.

Burning Calories...


We celebrated our 31st anniversary by going to a restaurant that had 3 things on the menu… steak….prime steak…. and special prime steak… We ate every bite it was so good… turns out the boys ate there the night before and had thirds and fourths on the potatoes and bread! The reason I mention this is because my husband rarely eats steak! Shows how hard these guys are working.

Friday, August 19, 2011

Meanwhile...Back at the Cabin...

We had barely gotten here when one of our neighbors a mile up the road told us of her harrowing experience going to bed one night recently. As her head hit the pillow she heard something banging on the outside wall above her head and looked up into the eyes and face of a huge black bear, paws outstretched on both sides of the window she had just closed. Hummm….

Another neighbor brought his shotgun over for me to keep until the boys get back from their trip.. just in case I need it…says bears have been a problem this year… dang… that’s the second time I’ve heard that and only been here less than 24 hours.

And if that’s not enough… nicknamed… the “Kila Pack”…. a pack of large grey wolfs is putting everyone here on high alert. Typically, the sound of a far off wolf call and the news that bear and moose scat is found on our property are great news to us….one of the reasons we love where we are… nothin’ more than a “heads up” to pay attention while we’re outside working … would have preferred this news another year. So… I work outside in this beautiful place with my bear spray in my back pocket… just in case and know the boys have guns and spray.

Quite frankly… I’m more concerned about whatever it is that’s living in the walls of my cabin…

Tuesday, August 16, 2011

The Great Divide Beckons...

Biking Montana's Continental Divide...

Montana is especially beautiful this August…. lots of late snow this year is keeping grasses green and rivers, streams and lakes crystal blue and full to the brim. Tomorrow I will drive my husband and his brother 1 ½ hours north to Rooseville, British Columbia and drop them off at the Canadian Border where they will begin their 15 day mountain bike trek along the Great Divide crossing the Continental Divide 5 times until they reach the southern border of Polaris, Montana.

Today we drove the 20 miles into town to replace our “expired” bear spray canisters. After all the hiking up here thankfully, we’ve never had to use one…only rehearsed it in our minds. So today, using what was left of an expired canister, we actually discharged the thing (did you know they actually kick back?) … now all they have to worry about is holding on to the dang thing while they’re shaking in their boots in front of an angry grizzly bear about to mess their pants. Actually, that would be me.

The two of them are busy packing exchanging gun holsters for food items finalizing last minute items and checking their maps for their 550 mile mountain bike trek. I even heard one of them firing his gun out back to be sure the new pin he had replaced worked ok.

8-16-2011... 11:30 a.m. Here we are at the border of Canada. It has taken about an hour to get everything rigged up and "Spots", GPS's points and maps and all that technology... I just wish they got an earlier start... they have a lot of climbing to do and only a short amount of time to do it in.

In the Garden....

In the Garden....

Montana...

In From the Garden...

In From the Garden...